

I know the carve out could have been a bit better but it’s rock solid and only bothers me a lot. (I’ll fix it in the morning)
Link to the conversion boards, they’re only €10 a piece and are made by an independent maker in Norway.
God i really want to do this, but i don’t want to fuck up my controller.
It’s super easy to do
There is part that will likely break when you do it which are the plastic clips that hold it together, but the little screws do the heavy lifting anyways so I clip them off when I open them.
Boring out the hole on the back so it’s big enough is not as hard as it looks as long as you go slow and use the right tools. Basically a long rough needle file is needed.
Just go slow and do a bit of research beforehand and it should go smoothly.
It’s best if you gauge it up slowly.
Would be nice to have a cover plate for it so it would look more professional, other than that though it looks awesome. Had I known about this when I got my Dualsense controllers I probably would’ve just gotten Dualshock controllers instead and done the conversion, but I thought that wasn’t doable or would require soldering. It’s nice that they put the connector on its own separate board.
It honestly blows my mind how repairable these are vs the Xbox One controllers.
Whereas these have 4 screws and clips (and if the clips break they don’t affect structural integrity) the Xbox One controller is just clips. I dread the day I have to fix one again.
I hate devices that are held together with just clips, they suck to repair. One wrong move and it’s broken worse. I’ll take a proprietary screw head over clips anyday.
One of the things I always check on devices is how important the plastic clips are, and if they’re not important they get clipped with flush cutters so they’re not a future issue for me or the next guy.
Also when they put hidden screws under the label, that really sucks. I usually throw those screws away and don’t put them back in most of the time since the only purpose of those hidden ones is to get people to break something trying to take it apart.
Usually the under label ones get put back in, the label just gets a permanent hole in it where the screw is.
I also tend to write the repair date, what (briefly) was fixed, and my initials inside the device. Depends on the size of the device and level of repair though.
I usually peel the label back and replace it afterwards so it looks nice, and in those cases I throw the screw away because if I need to open it I don’t want to peel the label back multiple times since that can crease it and reduce the strength of the adhesive.
That is a good idea to write what was done inside the case, would be nice if more people did that.
I picked up the habit of writing from fixing appliances, that way the next guy (usually you) will know what you did last time and also when the last time it was opened.
Particularly helpful if you have to bodge something in there as a “temporary” fix
No, theyre under the label because the label has to go somewhere.
Edit: yes, every single thing on the world is desinged to fuck you over. You’re not just miserable and stuck in a negativity loop.
I don’t really buy that and it seems to be way to charitable towards companies who would prefer people don’t open their stuff to repair it. Especially in cases where the screws are security screws meant to be harder to take them out, and they put six screws around the outside and one underneath the label footprint, or even worse, under some sticker veneer.
It’s very obvious when they intentionally try to hide the screw under labels or veneer and the reason for that is very clearly to make repair harder.
Yeah, they want to secure the center as well, not just the edges. These screws are often what holds the elecrronics into place.
There may be cases where some sneaky manufacturer did it on purpose, but it’s usually not the case.
You have screws under labels only on small devices as a matter of fact. .
If you didn’t have a history of inactivism I might take you much more seriously and also be more charitable here, but you do and the fact is that the practice of hiding screws underneath labels or veneers is a tactic well known to the right to repair movement which companies use to make their products more difficult to disassemble and therefore repair, and make it more likely for people to break something when trying to repair it.
Honestly no one here is nearly as charitable towards big tech companies as you’re being right now, we recognize that they don’t gain anything from right to repair movements and laws, they actually lose money as a result because if people are able to repair their devices, and companies are legally required to make them repairable, they can’t force customers to buy a new one multiple times because the old one broke.
New bottom surgery just dropped
Isn’t that technically the top of the controller, not the bottom? I mean it’s facing up or forwards when you’re holding it in your hand.
i, too, recharge through my bottom btw
I did the same to my 3ds. Totally worth it, especially considering that the original connector was not standard and did not make proper contact anymore.
Fuck yeah, I wanna do this.
Hell yeah!
Do you have a link to info on how you did that? I’d love to do the same.
I used this project. The seller didn’t have any in stock when I modded my console, so I got JLC PCB to manufacture the PCB and do the assembly. I also had to trim quite a bit of the chassis since I ordered the PCB too thick. My specific mod only fits in old xl models though. This tindie listing looks better than what I did and works on all consoles.
Thank you for the links! Scrolling through now getting ready to make some poor financial decisions.
Finally, a normal port for one of the best controllers. But does the console recognise controller if it’s connected through usb-c?
I imagine yes, as its the same protocol, same pins etc. USB C comes with extras, but I figure they are just not connected.
I can’t check on an actual ps4 as I don’t have one but it does recognize just the same on my PC, the connection is way more solid than the old micro connection too.
Edit: By “way more solid” I mean physically. It holds a USB C cable way better than it used to hold a Micro B cable.
Looking good, sis! Which doc and how did the recovery go?
I actually have a DualShock 4 that I’ve been meaning to do this to. The controller itself has served me well over the years, but that Micro-B port sucks ass.
It was super easy to do, it took me less than 15minutes per controller.
It took longer to swap the thumbsticks with aluminum sticks than it did to swap those boards.
I’d highly recommend it!
Just be sure to order the correct boards as there’s a bunch of different versions and they’re not interchangeable (for the most part)
EDIT: Spleling.
Edit2: Also don’t be afraid to break the plastic clips that aid in holding the controller together, I clip them off normally when I take a device apart and the 4 Philips screws that hold the controller together are plenty to hold it together without them.
Hell yeah bröther
Perverse
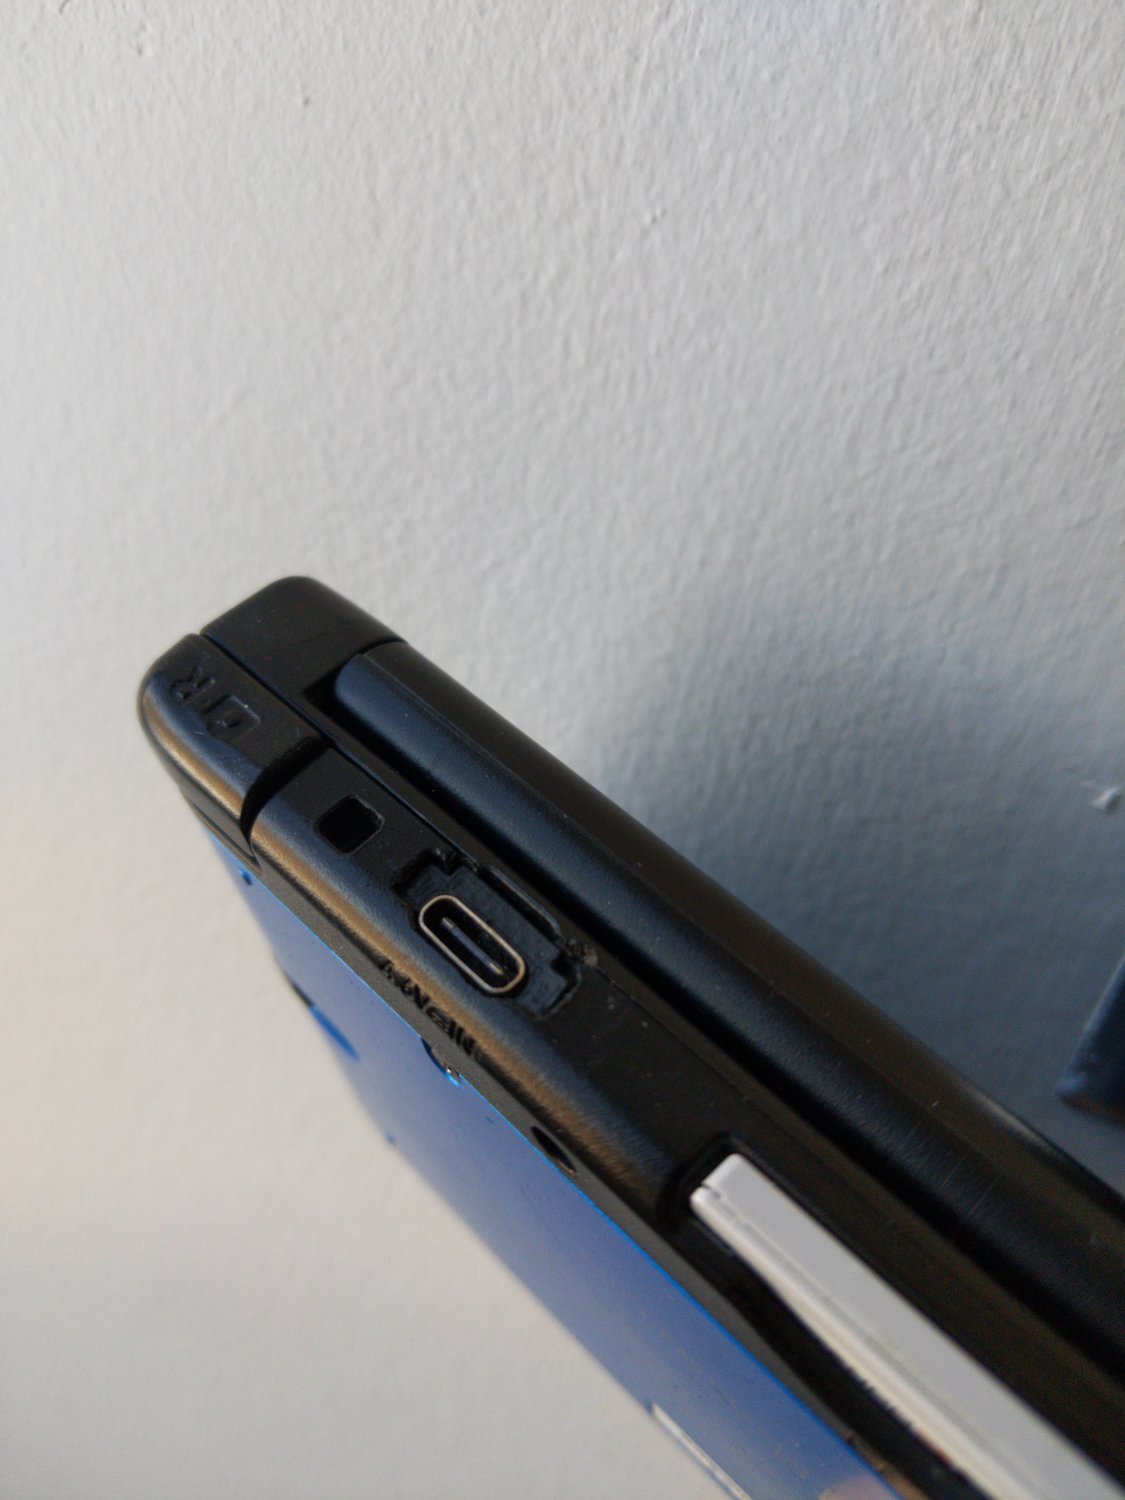
I definitely got a little rough with that hole.


![PS4 controller to USB C conversion complete [Rule]](https://lemmy.blahaj.zone/pictrs/image/63a58493-8f98-42d5-886f-9725bfd480b8.webp)